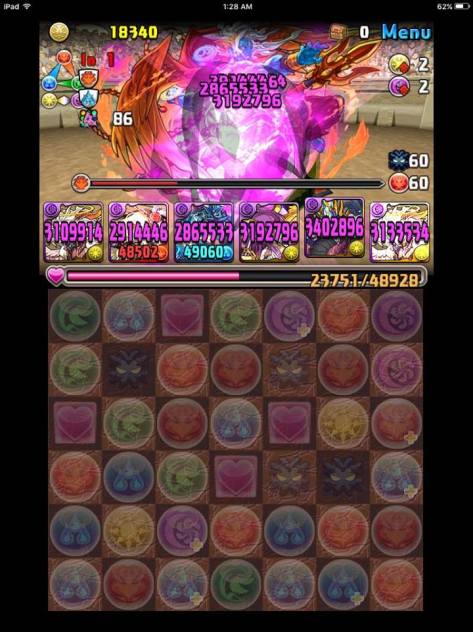
Challenge Dungeons 23 features 7×6 boards and was one of the easier challenges to date. We now have access to amazingly powerful monsters, an unlimited stalling potential second floor (through Parvati), and a delay-able final boss for Challenge 10.
I cleared Ch10 with both my accounts and was able to record a Fantastic clear with truly exciting gameplay….because I omitted the 99 turns I waited out on the second floor. Both accounts used all their actives to burst the first floor as you can endlessly stall on the second floor.
I took the more patient and safe approach with Fantastic and had to wait out the 99 turn 300k absorb. Thankfully my team is strong enough to not require concious thinking to do so. I am also fortunate to have both Yomi Dragons ![]() possess 2 Skill Delay Resist
possess 2 Skill Delay Resist ![]() latent awakenings which trivialized the final floor.
latent awakenings which trivialized the final floor.
I chose to use Awoken Lucifer ![]() for Mantastic and it was more problematic to try and form rows of 7 dark orbs and perhaps due to the late hour and fatigue, was not as seamless as I had to dance on the final floor for many turns before finally matching sufficient dark rows. The smart thing would have been being more patient on the second floor, but instead I chipped away at Parvati until I could use my 150k true damage nuke to bypass the 1% resolve. I still ended up with jammers so I am not quite sure why I did that.
for Mantastic and it was more problematic to try and form rows of 7 dark orbs and perhaps due to the late hour and fatigue, was not as seamless as I had to dance on the final floor for many turns before finally matching sufficient dark rows. The smart thing would have been being more patient on the second floor, but instead I chipped away at Parvati until I could use my 150k true damage nuke to bypass the 1% resolve. I still ended up with jammers so I am not quite sure why I did that.
Hopefully your Challenge 10 endeavours are successful and let me know what you used along with your strategy in the comments below.
Happy Puzzling!


Nicely done!
LikeLike
Thank you! I spent a lot of time walking around the house waiting for the 99 turns to wear off haha
LikeLike
I can imagine!
LikeLiked by 1 person
I used my Shivadragon, Ares, Krishna, Urd, Urd, Shivadragon (with 2 skill delays). I also had to wait out the 99 turns, but was pretty easy with 2 Urds to make heals when needed.
LikeLike
The 2 skill delays are amazing and somewhat trivializes the final floor’s most dangerous mechanic.
I believe a lot of players waited out the 99 absorption shield and thankfully it is not too stressful to do
Regardless, congrats on your victory!
LikeLike
Your website is pretty amazing!
LikeLike
Thank you for the kind words and thrilled you enjoy my content =D
LikeLike
Wait, why do you need to stall 99 turns of 300k absorb? Shouldn’t you just be able to whittle her down by making TPAs instead of match-5s?
Also, if you don’t have skill delay resists, can’t one-shot Shiva without skills, and don’t feel confident that you can survive two turns on him, consider a delay + damage active on Parvati. Activate the delay, trigger her resolve, use your other actives to set up the board, then kill her with the damage active, leaving your board intact for Shiva.
Full writeup with a link to video here: https://mischiefy1pad.wordpress.com/2016/03/29/challenge-dungeons-23/
LikeLike
I did not wait out the 99 turns on my other account (as pictured further down the post) and wanted to show the feasibility of stalling as many players are opting for that route as it is quite safe and requires minimal effort (video also shows how to do it). Stalling also removes the jammer and fire orbs debuff from the first floor. My Fantastic account is also reliant on utilizing Oku’s damage enhance as I lack anything to combo with Haku and being forced to use Oku’s active pre-emptively along with a damage active (losing a sub slot for what would be awoken Ra) is not worthwhile.
I could have also used Diza’s active (I simply forgot to) right before Shiva and that would have been sufficient to survive 2 turns until actives come back if I lacked skill delay resists.
There are numerous ways to tackle this challenge 10 and not everyone has a perfect board combo along with the right actives/subs to do via your/setsu’s route.
LikeLike
After thinking about it some more, I realized the piece I was missing is that you didn’t want to tank the <30% rage hit, so you stalled out the damage absorb in order to spike her down from full. That seems reasonable.
LikeLike
Yeah with Yomi Dragon teams you do not have the augmented HP to play around with and makes the execution ability that much more dangerous.
LikeLike
People noamlrly pay me for this and you are giving it away!
LikeLike