

Introduction
The GungHo Collab returns to North America with a large list of buffs and new evolutions for existing cards along with several debuting cards.
As a whole, this event does have respectable rolling rates as over 50% of the cards are Diamonds with the majority having value at this point in time. On the other hand, the bottom rarity may not be as appealing for players with more developed Boxes and will appear nearly half the time.
With this in mind, it is perfectly acceptable to treat this as a Trade-only event as there are several top rarity cards that are wonderfully powerful along with Monster Exchanges requiring five 6-star GFE.
Regardless of this, this article will outline the pros and cons for each card to give players a better understanding of what to expect in the GungHo Collab Rare Egg Machine.
One thing to keep in mind is that many of the cards at the 7 and 6-star rarity are cycled out with each event so cards like Zeta ![]() will not be available.
will not be available.
Video commentary
—video coming Monday—
Overview
GungHo Collab REM Pros & Cons – November 2020 |
|
Pros |
Cons |
|
|
GungHo Collab REM Rarities |
|
| 7-Star Base (25% total) |
|
| 6-Star Base (27% total) |
|
| 5-Star Base (48% total) |
|
GungHo Collab REM – November 2020 |
|
| S | |
| A | |
| B | |
| C | |
| D | |
Order within each tier is random and not reflective of ranking
Icons show Base form
Regardless of card’s ranking, you should always keep it if it is your very first time acquiring them
Bottom rarity quick summary
The bottom rarity should be the main motivation to roll in an event and the following chart shows all the 5-star Rankings. Just be mindful that these cards constitute 48% of the rolling pool.
GungHo Collab REM – November 2020 |
|
| S | |
| A | |
| B | |
| C | |
| D | |
Limit Breaking
Limit Breaking is the process of leveling a card beyond level 99. This will unlock more weighted stats along with the potential to receive Super Awakenings. These additional awakenings can add significant power, but only function in solo mode or in 3-player coop.
Any card that can qualify for Limit Breaking will have their level displayed in blue and feeding a Super Snow Globe will push them beyond the level 99 cap.
You can read more about Super Awakenings HERE.
Monster Exchange
The Monster Exchange System has mostly eliminated the need to roll in most events as players can simply trade in for a card of their choice. This is often done during lackluster events to avoid spending Stones on poor bottom rarity cards or to snipe a specific card if luck is not on your side.
Due to the rate of new cards being released, care should be taken when considering a trade as you want to ensure you gain long term value.
Weapon Assists
Weapon Assists are a special evolution for select cards that will be used exclusively as inherits. This form retains the same base stats as the original form, but will also transfer over all awakenings on the Weapon Assist card and this occurs if the Awoken Assist ![]() is present.
is present.
My approach to Collab/Seasonal rolling
Rolling any Rare Egg Machine is a gamble and it becomes a matter of maximizing your rate of returns in an event.
This translates into rolling when the bottom rarity has high value as those will be the most common cards. Furthermore, I may utilize the Monster Exchange system to acquire the higher rarity cards if they will significantly advance my progress. As such, I tend to look most closely at the bottom rarity pool to determine if it is worth rolling in.
This is just my own personal approach and everyone has different goals/motivations so take this section with a grain of salt. If you wish to read about this more in greater detail, check out my other article HERE.
Reincarnated Evolution
A Reincarnated Evolution (Revo) grants up to 8 Latent slots and is often times a stronger overall card. Sadly, pursuing these forms will lock the monster in this state as they cannot be reversed. As such, only commit to a Revo if you 100% know you will get significant value from them right away.
7 Star base
 Base Guardian Goddess Minerva (New) – A

Pros |
Cons |
|
|
Minerva is the first new cards to be released within the GungHo Collab and comes with a powerful leader skill for God cards. This leader skill will grant 2x HP, 18x ATK, 25% Damage Reduction, and +2 combos when matching any 4 colours and hitting 7 total combos. As a whole, this should be reasonably easy to achieve and she can favourably pair with Dyer ![]() to provide some RCV and Auto Follow Up damage.
to provide some RCV and Auto Follow Up damage.
Furthermore, Dyer helps solve Void spawns which can give Rainbow teams the most problems if they lack a VDP Super Latent.
In addition to her leadership potential, Minerva comes with solid personal damage and the ability to gain a Super Poison Resist ![]() along with a 3 turn base cooldown. This active will provide +10% ATK for each Time Extend on the team which has the potential to provide meaningful burst but at the same time, only provides a single turn along with a potentially low value. This is unfortunate as this is not an active that provides as much value overall but the low cooldown can be abused to carry another inherit of your choice.
along with a 3 turn base cooldown. This active will provide +10% ATK for each Time Extend on the team which has the potential to provide meaningful burst but at the same time, only provides a single turn along with a potentially low value. This is unfortunate as this is not an active that provides as much value overall but the low cooldown can be abused to carry another inherit of your choice.
![]() Guardian Goddess, Minerva (Dark Color)
Guardian Goddess, Minerva (Dark Color)

Pros |
Cons |
|
|
Dark Minerva functions as a mono Light leader who wishes to remain above 50% health and connect 6 or more Light orbs. This results in respectable Leader Skill multipliers but at the same time has several downsides.
Firstly, this massive Damage Reduction only functions when you are above 50% Health which is only boosted by 2.25x with dual leaders. Let’s say this brings your team to 100,000 HP which in turn means you have Effectively 250,000 HP. This is a respectable amount of Effective Health but at the same time, your team will have to often stall for 6 Light orbs along with your leads both having no personal damage.
Furthermore, pursuing this form takes away from her significantly stronger Base evolution who is able to lead a much more consistent team.
 Weapon Assist

Pros |
Cons |
|
|
Minerva’s Weapon Assist is able to provide a God Killer ![]() awakening and is one of two cards that can do this. This can be meaningful in God-heavy content and the two main downsides of this Weapon are a low base cooldown which can accidentally charge up along with the opportunity cost of not using her strong Base form.
awakening and is one of two cards that can do this. This can be meaningful in God-heavy content and the two main downsides of this Weapon are a low base cooldown which can accidentally charge up along with the opportunity cost of not using her strong Base form.
As such, I would pursue this Weapon Assist after her Base form has lost their value as a leader.
 Lakshmi, Goddess of Fortune (New) – A

Pros |
Cons |
|
|
Lakshmi is the Orb Skin card for the GungHo Collab which means she can be directly purchased with real life money. This aside, her Base form features two 10 Combos ![]() which translates into 25x personal damage against any spawn along with 4 Enhanced Fire Orbs
which translates into 25x personal damage against any spawn along with 4 Enhanced Fire Orbs ![]() which boosts your entire team’s damage output. Furthermore, she can use any Killer latent which bolsters her damage output to 84x for that respective typing.
which boosts your entire team’s damage output. Furthermore, she can use any Killer latent which bolsters her damage output to 84x for that respective typing.
With that being said, it is vital for Lakshmi to hit 10 or more combos to deal meaningful damage which will be your first goal.
If used as a leader, she is able to grant +4 combos with dual leaders when matching 7 or more connected Fire orbs. This is a potentially awkward number as a Row cannot be formed without 8 orbs and requiring 7 Fire orbs on 6×5 will result in stalling or reliance on cards like Grandis ![]() . This is not to say it will be impossible, but stalling will be required along with a Healing Solution due to 1x RCV.
. This is not to say it will be impossible, but stalling will be required along with a Healing Solution due to 1x RCV.
On the bright side, Lakshmi provides 4x HP with dual leaders along with an active skill that can be looped with a single card to provide 30% Damage Reduction for 7 turns on a 9 turn cooldown.
As a whole, I feel her Base form has reasonable leadership potential but will be slower to run compared to other options due to requiring 7 Fire Orbs and having to rely on subs to generate these orbs. On the other hand, if we do gain access to a 10-combo friendly Fire leader, Lakshmi will find more uses.
") Lakshmi, Goddess of Fortune (Dark Color)
Lakshmi, Goddess of Fortune (Dark Color)

Pros |
Cons |
|
|
Dark Lakshmi functions as a potentially strong leader when paired with Yurisha ![]() due to both cards wanting to match Fire or Dark L’s
due to both cards wanting to match Fire or Dark L’s ![]() .
.
As a general statement, L’s that are restricted to 2 colours can be problematic as you may run out of orbs along with having issues against Combo shields, Voids, and Resolve spawns. With this in mind, utilizing 7×6 will make your life much easier due to the 12 additional orbs.
Sadly, 7×6 is punished in current end game content as certain spawns in AA4/A6/Shura Realm will have new abilities if you enter their floor with a larger board. While these penalties are manageable, it is an extra layer of challenge that is not normally found and can influence which teams you bring into difficult content.
On the bright side, Dark Lakshmi paired with Yurisha does features solid multipliers which in turn can help dance out problematic mechanics and the 7×6 board does offset the orb hungriness to ensure reliable activation.
 Weapon Assist

Pros |
Cons |
|
|
Lakshmi’s Weapon Assist does not feel particularly special for a top rarity card as it only provides an Enhanced Heal Orb ![]() and Tape Resist
and Tape Resist ![]() , both of which are situational overall. This is because Enhanced Heart Orbs only function on high RCV cards and low RCV teams whereas Tape Resist is situational and can be skipped in many cases.
, both of which are situational overall. This is because Enhanced Heart Orbs only function on high RCV cards and low RCV teams whereas Tape Resist is situational and can be skipped in many cases.
With that being said, if you are playing through AA4 and your HP is below 98,138 with no awakenings, you run the risk of dying to the Myne + Kurone combo. Thus, the 7 turn 30% Damage Reduction may be enough to save you. On the other hand, if you do not need the extra Effective HP, I feel this active skill will not be highly prized as an inherit.
Orb Skin

 Loki, Wily God of Destruction (New) – A

Pros |
Cons |
|
|
Loki’s is the third new 7-star card to be added into the GungHo Collab and features a unique Leader Skill that results in 0.25 HP and 93.75% Damage Reduction.
This translates into high Effective Health but at the cost of always having to match two Water combos in order not to die as 25% HP means anything will kill you without Damage Reduction.
Perhaps this could have been viable if the pay out was large enough, but 289x ATK and +4 combos is nothing special and is better to pursue his other forms.
") Wily God of Destruction, Loki (Dark Color)
Wily God of Destruction, Loki (Dark Color)

Pros |
Cons |
|
|
Dark Loki becomes a potent Rainbow leader for Devil type cards as he boasts high Effective Health through 75% Damage Reduction when matching 3 or more colours and 2.25x HP. This is a solid amount of bulk as you can multiply your final HP value by 4 which in turn means players can survive essentially any non-execute.
This is meaningful when playing through challenging content as newer spawns feature more problematic mechanics or will force players to spend multiple turns due to massive Damage Reduction or Super Resolve.
Sadly, Dark Loki’s Leader Skill features a terribly low ATK multiplier of only 196x which can place pressure to deal enough damage to overcome tankier spawns. On the bright side, Loki’s own personal damage is amazingly high due to his four <50% ![]() and 7 Combo
and 7 Combo ![]() Super Awakening. These translate into 32x personal damage against any spawn along with him having wonderfully high ATK stat. Furthermore, his Leader Skill adds +4 combos which means hard hitting cards such as Leona
Super Awakening. These translate into 32x personal damage against any spawn along with him having wonderfully high ATK stat. Furthermore, his Leader Skill adds +4 combos which means hard hitting cards such as Leona ![]() and Iori
and Iori ![]() can function to their fullest potential.
can function to their fullest potential.
 Weapon Assist

Pros |
Cons |
|
|
Loki’s Weapon Assist is able to provide 2 Evolution ![]() and a single Physical
and a single Physical ![]() Killer awakening. For the most part, these two Killers are quite niche as few spawns with these typings are truly dangerous but at the same time, this is one of two cards that have two Evolution Killers which may be helpful in future Rankings or when Farming content.
Killer awakening. For the most part, these two Killers are quite niche as few spawns with these typings are truly dangerous but at the same time, this is one of two cards that have two Evolution Killers which may be helpful in future Rankings or when Farming content.
With that being said, I would still retain his Dark form for the foreseeable future.
 Dazzling Beast Goddess, Tsukuyomi – A

Pros |
Cons |
|
|
GungHo Yomi returns and still retains her place as a powerful Norza ![]() pairing for challenging content. At this point in time, I feel Yomi x Norza is best suited for Alt. Arena 4 as the numerous Resolve, Time, and RCV Debuffs are easily handled along with sufficient damage overall. In fact, this pairing was my first and most consistent team to farm AA4 when she first came out and all of that should hold true today, especially if you are able to use Norza as a sub. If you wish to read more about my team building process for Yomi x Norza, check out my other article HERE.
pairing for challenging content. At this point in time, I feel Yomi x Norza is best suited for Alt. Arena 4 as the numerous Resolve, Time, and RCV Debuffs are easily handled along with sufficient damage overall. In fact, this pairing was my first and most consistent team to farm AA4 when she first came out and all of that should hold true today, especially if you are able to use Norza as a sub. If you wish to read more about my team building process for Yomi x Norza, check out my other article HERE.
While it is perfectly doable to clear Shura Realm with Yomi x Norza, Velkhana ![]() performs better with Norza due to the higher ATK and Effective Health multipliers. This is important because Shura Realm is more of a damage and durability check while being less mechanically demanding along with few Resolve spawns.
performs better with Norza due to the higher ATK and Effective Health multipliers. This is important because Shura Realm is more of a damage and durability check while being less mechanically demanding along with few Resolve spawns.
During the previous GungHo Collab event, I Monster Exchanged for Yomi as it opened up a much stronger team for myself at the time but looking at the current state of the game now, I probably would not Monster Exchange right now with my given Monster Box. This is because I lack a Norza of my own and their team only truly shines if you have a Norza as a sub.
With that being said, if you own a Norza, Monster Exchanging for Yomi will be meaningful if you lack other viable leaders.
") Dazzling Beast Goddess, Tsukuyomi (Dark Color)
Dazzling Beast Goddess, Tsukuyomi (Dark Color)

Pros |
Cons |
|
|
Dark Yomi has the capacity to generate a row of Water orbs at the top on a 3 turn cooldown in exchange for 0x RCV and -2s movement time. This is a fair trade for a non-Transforming card and I can see her having value in mono Water teams who are orb hungry.
With that being said, this form pales in comparison to her Base evolution as the Leader Skill just has high multipliers and no extra zest or Damage Reduction.
As such, I feel that players should retain Yomi in her Base form until it runs out of value. When that does occur, her new Weapon Assist could also be pursued.
 Weapon Assist (New)

Pros |
Cons |
|
|
GH Yomi’s new Weapon Assist is able to provide 2 Enhanced Water Orbs ![]() along with a single Machine Killer
along with a single Machine Killer ![]() . This Machine Killer will provide 3x personal damage for the owning card which has tremendous applications for Shura Realm where the most spawns are Machines.
. This Machine Killer will provide 3x personal damage for the owning card which has tremendous applications for Shura Realm where the most spawns are Machines.
As such, this can be a wonderful way to add in additional damage but the main downside is the opportunity cost of using this form instead of her Base evolution. This is because her Base form can clear all content currently available when paired with Norza ![]() . With that being said, there will come a time when you do gain stronger leaders and when that does happen, converting to a Weapon Assist will be meaningful.
. With that being said, there will come a time when you do gain stronger leaders and when that does happen, converting to a Weapon Assist will be meaningful.
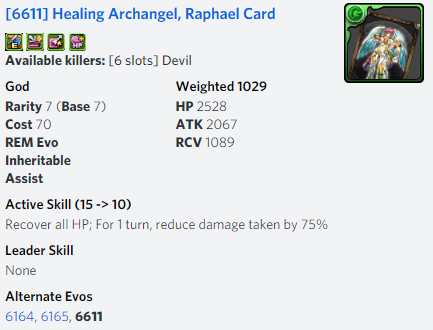
 Healing Archangel Raphael – C

Pros |
Cons |
|
|
Raphael’s Base form is an underwhelming affair as his entire kit revolves around being above 80% HP. This is problematic as it is a narrow window for success and is easy to be pushed out of it.
While this can be somewhat offset by his active skill and 75% Damage Reduction from Leader Skill, you are still juggling with a small amount of health and multi-hits will tear through him.
As a whole, Base Raphael does not accomplish much unless players never take damage but even then, his own personal damage only shines with a 3×3 Box.
") Healing Archangel Raphael (Dark Color)
Healing Archangel Raphael (Dark Color)

Pros |
Cons |
|
|
Dark Raphael continues the sad tale of a top rarity card trying to find a purpose in today’s meta. While he is a significant upgrade to his Base form, he is still not performing well enough to push out other available options.
While his personal damage is high at 10 combos, we have many other cards who can achieve this that also provide additional utility. Raphael has no Resists and his active skill is a tri colour board changer with a small 1.5x ATK. While this is nice, it does not truly counter any mechanics outside sizable ATK debuffs but the 1.5x cannot be relied upon as a Bust.
As a whole, I am quite disappointed with Dark Raphael.
 Weapon Assist (New)
Pros |
Cons |
|
|
Raphael’s Weapon Assist is able to provide a single >80% ![]() and FUA
and FUA ![]() . For the most part, these are both low impact awakenings to have as the majority of teams either have Follow Up Attack through their leader skills or somewhere as an awakening.
. For the most part, these are both low impact awakenings to have as the majority of teams either have Follow Up Attack through their leader skills or somewhere as an awakening.
With that being said, there may be an instance where you cannot bring FUA but need to have it on your team. When or if this does occur, Raphael’s Weapon will have more value but it will be a rare occasion at best.
 Reginleif, Bearer of the Slain – A

Pros |
Cons |
|
|
Reginleif returns with a slightly upgraded active skill that is now able to clear 5 turns of Awoken Binds along with 5 turns of Unable to Match Orb effects. Furthermore, she still retains her ability to create Dark Skyfalls for 3 turns on a 6 turn cooldown.
This means two Reginleifs can loop their active but this is probably unneeded as it will take up 1/3 of your cards and the active itself does not directly make Dark orbs on the turn it is used.
As such, I feel that having 2 Reginleifs is not truly needed and instead should be used as a solution for Awoken Binds and Unable to Match Orb effects.
With that being said, I feel that Reginleif has lost some of her edge as a top Dark sub as more zesty options have come out with cards like Allatu ![]() providing more Effective Skill Boosts
providing more Effective Skill Boosts ![]() and Super Poison Resist
and Super Poison Resist ![]() or Wrath
or Wrath ![]() having a stronger active for end game content and the same Skill Boosts. This is not to say Reginleif is a weak card, just more options are now available.
having a stronger active for end game content and the same Skill Boosts. This is not to say Reginleif is a weak card, just more options are now available.
") Reginleif, Bearer of the Slain (Dark Color)
Reginleif, Bearer of the Slain (Dark Color)

Pros |
Cons |
|
|
Dark Reginleif has potent TPA ![]() damage along with a wonderfully low base cooldown to inherit an active skill of your choice. Unfortunately, she may be harder to use efficiently due to the fact that she is less universally helpful as her main appeal will be her TPA damage as there is no utility or Resists available.
damage along with a wonderfully low base cooldown to inherit an active skill of your choice. Unfortunately, she may be harder to use efficiently due to the fact that she is less universally helpful as her main appeal will be her TPA damage as there is no utility or Resists available.
This is problematic as she will not provide any utility and TPA damage is often less useful, especially on mono colour teams that rely on blobbing their primary colour.
On the other hand, her Leader Skill grants 484x ATK for Devil and Attacker cards for having any 4 match. This is tremendously easy to achieve and may have some value when playing through easier content that does require higher damage. With that being said, this Leader Skill has low Effective Health which makes it inappropriate to use for harder/current content.
With this in mind, I feel it would still be best to pursue her other forms unless you feel Dark Reginleif’s Leader Skill will be helpful right now.
 Weapon Assist (New)

Pros |
Cons |
|
|
Reginleif’s Weapon Assist comes with a rarely seen Dragon Killer ![]() and 2 Enhanced Dark orbs
and 2 Enhanced Dark orbs ![]() . As a whole, the value of a Dragon Killer will hinge on what kind of content you are playing through but if you are currently tackling AA4, it can be invaluable as the final 2 MP Dragon floors are, well Dragons. As such, it can be an efficient way to layer in personal damage and along with having a powerful active.
. As a whole, the value of a Dragon Killer will hinge on what kind of content you are playing through but if you are currently tackling AA4, it can be invaluable as the final 2 MP Dragon floors are, well Dragons. As such, it can be an efficient way to layer in personal damage and along with having a powerful active.
This active will clear 5 turns of Awoken Bind and Unable to Match Orb clear along with a 3 turn Dark Skyfall. This active will counter numerous spawns in AA4 which again, is valuable.
With that being said, Reginleif’s Base form is still powerful and players may find more value in using that in the mean time.
 Base Gamayla – B

Pros |
Cons |
|
|
Base Gamayla has little value compared to other forms as she is a relatively generic Water sub here and her Leader Skill requires a Water L and 3 or more colours which can be a hassle overall.
 Dark Gamayla

Pros |
Cons |
|
|
Dark Gamayla boasts strong personal damage with 10 or more combos and is able to layer in additional damage with a TPA ![]() match. This can enable her to function as a Damage solution for a high-combo team along with having Cloud Resist
match. This can enable her to function as a Damage solution for a high-combo team along with having Cloud Resist ![]() . Sadly, Dark Gamayla suffers from a few problematic weaknesses.
. Sadly, Dark Gamayla suffers from a few problematic weaknesses.
Firstly, her base active is poorly tuned as it is a tri colour board changer with no Hearts on a 14 turn cooldown. Normally these types of actives are around 7-8 turns but the inclusion of +3 combos adds significant more stalling time. While +3 combos is helpful, I do not feel it justifies the longer cooldown which in turn lowers Gamayla’s value as she is less suited to carrying an inherit and her base skill is underwhelming as a whole.
Furthermore, Dark Gamalya only has one Skill Boost ![]() which will exclude her from Transforming teams. With this in mind, if you have exhausted the value she provides in this form, her Weapon Assist may be a viable option to pursue.
which will exclude her from Transforming teams. With this in mind, if you have exhausted the value she provides in this form, her Weapon Assist may be a viable option to pursue.
 Weapon Assist (New)

Pros |
Cons |
|
|
Gamayla’s Weapon Assist is able to provide a single Team HP ![]() & RCV
& RCV ![]() which adds a modest amount of bulk to any given team and is universally helpful. Furthermore, it also provides Tape Resist
which adds a modest amount of bulk to any given team and is universally helpful. Furthermore, it also provides Tape Resist ![]() , 2 Enhanced Water Orbs
, 2 Enhanced Water Orbs ![]() , and 2 turns of Delay which can act as 2 Effective Skill Boosts
, and 2 turns of Delay which can act as 2 Effective Skill Boosts ![]() . Furthermore, this Delay has a small orb changing component which helps ensure it will always have some value when used.
. Furthermore, this Delay has a small orb changing component which helps ensure it will always have some value when used.
While all of these are valuable aspects, it does compete with other Effective Skill Boost Weapons such as Spirit Ally, Kororo ![]() and Amatsu’s Lute
and Amatsu’s Lute ![]() . As a whole, Amatsu’s Lute is the most universally flexible and powerful while Kororo is the most offensive for mono Water and has tremendous value in AA4 where the Balance Killer
. As a whole, Amatsu’s Lute is the most universally flexible and powerful while Kororo is the most offensive for mono Water and has tremendous value in AA4 where the Balance Killer ![]() is valuable due most later floor spawns having this typing.
is valuable due most later floor spawns having this typing.
 Base Aoi Shikigami – A

Pros |
Cons |
|
|
Shikigami’s Base form comes with strong personal damage against both Machines and Devil type spawns due to his 4 Killers and is further empowered by two >80% ![]() and a 7 Combo
and a 7 Combo ![]() Super Awakening while also able to use any Killer latent.
Super Awakening while also able to use any Killer latent.
This combination has tremendous value in Shura Realm where the majority of spawns are Machines and one of the strongest non-Machine floors is Devil. As such, Shikigami can function as a potent damage solution when tackling Shura Realm and his main downside is some damage being tied to >80% and a middling active skill.
As a general blanket statement, >80% awakenings tend to be the least reliable as their window for success is quite narrow along with being inefficient as each one only provides 1.5x ATK. With that being said, Shikigami still has 18x ATK against Devil and Machine spawns before Killer Latents are taken into consideration.
On the other hand, his active skill is a bit underwhelming for Shura Realm as the 100% DEF Break not find enough value as the tankiest spawns have high Effective Health due to Damage Reduction, not DEF. As such, the 10 turn cooldown for a Light to Dark orb changer is quite long. With that being said, Shikigami is still a potent Damage Solution for Shura Realm.
 Aoi Shikigami [Dark Color]

Pros |
Cons |
|
|
Dark Shikigami features fantastic personal damage against God and Dragon spawns when below half health due to their Killers and <50% ![]() awakenings. This damage is not reliant on a specific combo count and ease of use is a major appeal.
awakenings. This damage is not reliant on a specific combo count and ease of use is a major appeal.
As such, many Farming teams tend to favour this awakening as it provides a wonderfully high amount of damage with little effort and can be mixed with Rows to further boost damage.
At this point in time, Euchs ![]() is the only truly dominating <50% leader for Shura Realm and a well put together team has no true use for Shikigami as a dupe Euchs is a far superior Damage Solution and Shikigami does not provide any meaningful utility.
is the only truly dominating <50% leader for Shura Realm and a well put together team has no true use for Shikigami as a dupe Euchs is a far superior Damage Solution and Shikigami does not provide any meaningful utility.
As such, I feel Dark Shikigami will function mostly as a Damage Solution for Farming teams or as an alternative to a dupe Euchs as his active can both generate 10 orbs and set your HP to 1 on a blistering 6 turn cooldown.
 Weapon Assist (New)

Pros |
Cons |
|
|
Shikigami’s Weapon Assist is able to provide Full Bind Immunity ![]() , >80%
, >80% ![]() , and 40% Jammer Resist
, and 40% Jammer Resist ![]() . As a whole, these are reasonable awakenings but at the same time, nothing exceptionally special as many things are naturally Bind Immune along with Shura Realm not having any notable Binds.
. As a whole, these are reasonable awakenings but at the same time, nothing exceptionally special as many things are naturally Bind Immune along with Shura Realm not having any notable Binds.
With this in mind, I would be most inclined to pursue his other forms as they offer more value at this point in time.
 Base Luluna – B

Pros |
Cons |
|
|
Base Luluna has the potential to be an easy to use Farming leader who can provide +6 combos when matching 6 or more Wood orbs. This will trivialize Combos Shields and her active will generate a row of Wood and provide +3 combos. This means using this active and swiping it will yield 10 combos which is truly absurd.
These bonus combos do help offset the lower Leader Skill multipliers but her main appeal will be the ease in which you can farm a dungeon that has Combo Shields. Beyond this, I feel Luluna does not offer that much as a sub which is further compounded by the lack of a top-tier Wood leader.
 Luluna [Dark Color]

Pros |
Cons |
|
|
Dark Luluna gains access to four unique Killers along with the possibility of having triple 7 Combo ![]() . This in turn can grant her formidable personal damage but the main issue is the opposing spawn has to ideally have at least 2 typings she is effective against.
. This in turn can grant her formidable personal damage but the main issue is the opposing spawn has to ideally have at least 2 typings she is effective against.
This in turn can lower her overall potency as a Damage Solution while also no team to shine on and take advantage of her.
This will be the fate of many Wood cards and the fact that Dark Luluna does not have a Machine Killer ![]() will further hinder her usage as Shura Realm is currently the best dungeon to play.
will further hinder her usage as Shura Realm is currently the best dungeon to play.
 Weapon Assist (New)

Pros |
Cons |
|
|
Luluna’s Weapon Assist is able to provide 40% protection against both Jammer ![]() and Poison
and Poison ![]() mechanics along with 2 Wood Rows
mechanics along with 2 Wood Rows ![]() for Passive Damage.
for Passive Damage.
As a whole, these are reasonable awakenings but the main issue is a lack of an ideal team to use it on. This is attributed to the fact that JP and NA have different events and the absence of several strong Wood leaders in NA.
As such, I feel that there is no reason to pursue this Weapon as her Base form will fulfill a more unique roles as a high combo Farming leader.
 Knight Kisaragi – B

Pros |
Cons |
|
|
Base Knight comes with an active skill that can deal 500,000 damage to an enemy three times and will change targets if the original perishes. This large Button can be used to execute floors without matching orbs which saves time and mental exertion.
At this point in time, Button actives function best in a Farming situation or in Ranking Dungeons where both speed and efficiency reign supreme. Furthermore, this active will also produce a bi colour board of Light and Wood orbs which can be easily solved next floor.
Furthermore, Knight’s Leader Skill grants 1.3x Egg Drop rate and is an alternative to Veroah ![]() . With that being said, Veroah is a superior if matching is required as Knight’s ATK multiplier only takes effect at 9 combos whereas Veroah’s smaller multiplier procs at 5 combos.
. With that being said, Veroah is a superior if matching is required as Knight’s ATK multiplier only takes effect at 9 combos whereas Veroah’s smaller multiplier procs at 5 combos.
This type of Leader Skill performs best when farming Event Tokens/Medals as you can play on an easier difficulty in solo mode and Button every floor.
 Knight Kisaragi [Dark Color]

Pros |
Cons |
|
|
Dark Knight is both a movie and a card who can provide 99 turns of Light Skyfalls. This is a tremendous boon to mono Light teams as the +7% chance helps provide a steadier stream of Light orbs. For a while, this was one of the best solutions for mono Light but at this point in time, we have access to Transforming cards such as Ferule ![]() who can provide a much more reliable stream of Light orbs.
who can provide a much more reliable stream of Light orbs.
Furthermore Knight has lost some luster as a Damage Solution as his offensive spread is nothing special, has no Resists, no Killers, and no utility overall.
With this in mind, I would be most inclined to keep him in his Base form, especially if you do not own another card that has bonus Egg Drop rates.
 Weapon Assist (New)

Pros |
Cons |
|
|
Knight’s Weapon Assist is able to provide a single Skill Boost ![]() and the same 1.5M Button featured in his Base form. This naturally has wonderful applications for Farming or Ranking Dungeons and the Skill Boost helps ensure it is ready in time.
and the same 1.5M Button featured in his Base form. This naturally has wonderful applications for Farming or Ranking Dungeons and the Skill Boost helps ensure it is ready in time.
With that being said, I feel that Knight will have the most value in his Base form as the 1.3x Egg Drop rate is quite rare and you will still retain access to this valuable active.
 Cian, the Assault of Lost Gear – A

Pros |
Cons |
|
|
Cian has become an interestingly durable mono Wood leader due to her 4x HP and 43.75% Damage Reduction Leader Skill. This combination yields a wonderful amount of Effective Health and Cian’s active solves her 1x RCV.
This active will provide a 30% max HP Heal every turn for 4 turns on a 9 turn cooldown which can be chained with another Cian. This amount of sustain becomes meaningful when your HP is at 200k+. Furthermore, the 324x ATK multiplier is significant along with having Auto Follow Up Attack.
While all of this sounds promising, Cian does suffer from the need to always match a Wood L for ATK and 6 or more orbs for Damage Reduction and Follow Up Attack. This will grossly hinder your combo count and when facing Void spawns, you will need 14 Wood orbs to form an L and 3×3 Box.
As a whole, I feel she can clear content but it will be a slower affair with combo shields and Void spawns presenting an additional hurdle to overcome.
") Cian, the Assault of Lost Gear (chibi) (New)
Cian, the Assault of Lost Gear (chibi) (New)

Pros |
Cons |
|
|
Cian’s new Pixel form has a truly unique kit as she features a Leader Swap active and solid multipliers overall. Up until now, Leader Swapping has not been abused too much as the original usage was entering a dungeon with 7×6 and then swapping into a leader with better multipliers.
Due to Transforming and AA4/Shura punishing 7×6 teams, this practice has fallen out of favour as many teams can achieve outstanding multipliers on a 6×5 board.
With that being said, the practice of entering a dungeon with an EXP leader and then swapping still remains valid for players who are at an exceptionally high rank. The idea remains the same as players will enter something like Alt. Shura Realm in coop with Ganesha ![]() for 1.8x Rank EXP and then swap into someone with better multipliers.
for 1.8x Rank EXP and then swap into someone with better multipliers.
As such, Cian can be this better Swap as she does not require an inherit to do this along with having outstanding multipliers overall. With that being said, this approach will most likely require coop to have sufficient Skill Boosts ![]() to Swap right away and is not truly applicable for the majority of players. This is because Rank Experience does not start to get out of hand until the mid 900’s along with Alt. Shura Realm providing enough Rank Experience to chain Rank Ups for a prolong time.
to Swap right away and is not truly applicable for the majority of players. This is because Rank Experience does not start to get out of hand until the mid 900’s along with Alt. Shura Realm providing enough Rank Experience to chain Rank Ups for a prolong time.
As a whole, I am not a fan of pushing Rank Experience due to the way the system punishes higher ranking players as you cannot chain rank ups as easily.
With that being said, Chibi Cian is still a powerful leader as she boasts solid multipliers that is easy to use.
 White Feathered Knight, Bradamante – A

Pros |
Cons |
|
|
Bradamante has been significantly upgraded to now include a Super Blind Resist ![]() as part of her base awakenings. This grants her an additional layer of utility on top of her solid damage potential when hitting 10 or more combos. Furthermore, her 5 turn active skill grants flexibility with inherits along with generating Light orbs and Locking the board. This Locking aspect will ensure players can overcome Spinners for that turn.
as part of her base awakenings. This grants her an additional layer of utility on top of her solid damage potential when hitting 10 or more combos. Furthermore, her 5 turn active skill grants flexibility with inherits along with generating Light orbs and Locking the board. This Locking aspect will ensure players can overcome Spinners for that turn.
While all of this is meaningful, one has to consider the unique potential she offers in her new Chibi form as it features a Leader Swap active along with massive multipliers.
") White Feathered Knight, Bradamante (chibi) (New)
White Feathered Knight, Bradamante (chibi) (New)

Pros |
Cons |
|
|
Bradamante’s Chibi form follows a similar template to Chibi Cian ![]() as both cards feature a Leader Swap active while also having substantial multipliers. This enables her to abuse either entering a dungeon with 7×6 or a Rank Experience leader and then swapping to Chibi Bradamante’s leader skill.
as both cards feature a Leader Swap active while also having substantial multipliers. This enables her to abuse either entering a dungeon with 7×6 or a Rank Experience leader and then swapping to Chibi Bradamante’s leader skill.
As mentioned above, 7×6 does have a penalty for Shura Realm or AA4, but it can be managed and the larger board does give more leeway when matching orbs in various patterns. On the other hand, abusing Rank Experience does become more viable at high 900’s when it becomes much more challenging to chain Rank Ups.
With that being said, Chibi Bradamante does enjoy wonderful Leader Skill multipliers and could possibly be used on her own along with enjoying the 15 turns of Light Skyfalls. Just be mindful you need 2 Light combos to function but this can be greatly offset by using 7×6.
 Great Witch of the Dark Flowers, Reeche – A

Pros |
Cons |
|
|
GH Reeche has been buffed to now have 3 Skill Charges ![]() which in turn grants them the ability to charge up their active skill by 4 turns with each Rainbow match. This drastically accelerates their cooldown to potentially 7.5 turns from 30.
which in turn grants them the ability to charge up their active skill by 4 turns with each Rainbow match. This drastically accelerates their cooldown to potentially 7.5 turns from 30.
This is fantastic news as Reeche’s active provides a Rainbow board along with 2 turns of Damage and Attribute Absorb Void. Both of these mechanics are found throughout end game content and having quicker access to their counters is meaningful.
Furthermore, they have a strong Leader Skill as it only requires 7 total combos and any 4 colours for 20x ATK and 50% Damage Reduction along with +2 seconds of orb movement time. This could be paired with Halloween Sonia Gran ![]() to grant her a much needed Shield (2/420/1/50%/+2c).
to grant her a much needed Shield (2/420/1/50%/+2c).
 Weapon Assist

Pros |
Cons |
|
|
GungHo Reeche’s Weapon Assist is able to provide a single Skill Boost ![]() , Full Bind Immunity
, Full Bind Immunity ![]() , and a 30 turn cooldown that has a valuable active.
, and a 30 turn cooldown that has a valuable active.
This 30 turn cooldown can be abused to ensure it never accidentally charges up but at the same time, can be frustrating as the active skill is something you may actually use.
This is because it provides 2 turns of Colour and Damage Absorb Void which are commonly found within current end game content. As such, this Weapon Assist will never be a bad thing if it does charge up.
6 star base
 Goddess of the Past, Urd – S

 Weaver of the Past, Urd

 Weaver of Destiny, Urd

Pros |
Cons |
|
|
Urd is able to function as a powerful Farming solution provided you are able to populate your team with Reincarnated cards. This is because her 400x ATK requires players to be below 50% health and nothing else.
This is incredibly easy to achieve and the hardest part will be populating your team appropriately. Furthermore, Urd’s high personal damage against Devils and Healers has tremendous value in Training Arena 2 where the majority of spawns have these typings.
As such, I feel she will be best used as a powerful Farming solution as you retain 400x ATK when below 50% HP which should be doable with 2 Urd actives.
On the other hand, her new Chibi form offers quite an exciting array of benefits.
") Weaver of Destiny, Urd (chibi) (New)
Weaver of Destiny, Urd (chibi) (New)

Pros |
Cons |
|
|
Chibi Urd is a surprisingly powerful leader as she features 2x HP / 20x ATK / 2x RCV when matching 6 or more connected Fire orbs along with Auto Follow Up Attack. This has wonderful synergy with Dante ![]() who requires the same number of Fire orbs but also provides some Damage Reduction and bonus combos.
who requires the same number of Fire orbs but also provides some Damage Reduction and bonus combos.
In addition to this, she also has strong personal damage when below 50% HP which should always be doable when you utilize her 1 cooldown active. This active skill will provide 3 Fire orbs and a -50% HP cut while also reducing Dark ATK. This ATK reduction will overwrite any existing debuff and does not impact your Fire damage despite having a Dark sub attribute.
This is valuable as you can spam this active every turn while also being able to carry a useful inherit should you require additional utility. As a whole, I feel Chibi Urd is a wonderfully powerful card who can function as a potent leader but will also be able to work as a mono Fire sub, especially if other cards wish to be below 50% health.
 Goddess of the Present, Verdandi – B

 Creator of the Present, Verdandi

 Creator of Destiny, Verdandi

Pros |
Cons |
|
|
GH Verdandi is significantly worse compared to GH Urd ![]() as her activation requirement requires Heart orbs which means players need both Water and Hearts to succeed. Furthermore, Verdandi’s personal damage only takes effect against Gods which is quite limited by comparison.
as her activation requirement requires Heart orbs which means players need both Water and Hearts to succeed. Furthermore, Verdandi’s personal damage only takes effect against Gods which is quite limited by comparison.
As such, I do not feel she offers that much in this form as she does not even produce both Water and Heart orbs.
") Creator of Destiny, Verdandi (chibi) (New)
Creator of Destiny, Verdandi (chibi) (New)

Pros |
Cons |
|
|
Chibi Verdandi is an interesting card that falls flat on most fronts as her entire kit is a bit awkward. This is because her Leader Skill is reliant on matching 5 or more Heart orbs which could have synergy with Norza ![]() but the fact that you may overwrite Water Orbs with her active is problematic. This also means she may be too risky of a sub for Norza teams should you lack Yuri
but the fact that you may overwrite Water Orbs with her active is problematic. This also means she may be too risky of a sub for Norza teams should you lack Yuri ![]() or a dupe Norza.
or a dupe Norza.
Furthermore, the this pairing does not exceed the potential of Norza paired with Yomi ![]() or Velkhana
or Velkhana ![]() along with the fixed movement time being wasted as Norza can overwrite debuffs constantly.
along with the fixed movement time being wasted as Norza can overwrite debuffs constantly.
As a whole, I am saddened by the lack of love Verdandi has received compared to GH Urd.
 Goddess of the Future, Skuld –

 Guardian of the Future, Skuld

 Witness of Destiny, Skuld

Pros |
Cons |
|
|
GungHo Skuld is the wrong colour compared to her GFE counterpart and in this form she is an underwhelming affair.
This is because she has far too many SBR ![]() awakenings which are redundant with a fully populated team. This in turn eats into her possible awakenings leaving her with not much else to show.
awakenings which are redundant with a fully populated team. This in turn eats into her possible awakenings leaving her with not much else to show.
As a leader, she can achieve 324x ATK when all cards are Reincarnated and 2 Wood combos are achieved. This could be used for Farming some content but you will have no Damage Reduction if 2 Wood combos are not matched.
With this in mind, it is best to look at her new Chibi form instead.
") Witness of Destiny, Skuld (chibi) (New)
Witness of Destiny, Skuld (chibi) (New)

Pros |
Cons |
|
|
Chibi Skuld is a significant upgrade compared to her previous form as she has ditched the excessive SBR ![]() and has a healthier spread of awakenings. She now has access to Super Poison Resist
and has a healthier spread of awakenings. She now has access to Super Poison Resist ![]() or 7 Combo
or 7 Combo ![]() and a 10 Combo
and a 10 Combo ![]() awakening along with a Leader Skill that features large multipliers.
awakening along with a Leader Skill that features large multipliers.
These multipliers are tremendously high for Wood cards while also having Auto Follow Up Attack and Fixed Movement time to become immune to Time Debuffs. Sadly, her 576x ATK relies on Wood, Water, and Light orbs being matched at once which can be limiting overall. This is because it may be harder to concentrate damage as orb changers will be more restricted along with her own personal damage not coming into effect without 10 combos.
As such, she would either have to pair with a 7×6 leader or someone with bonus combos that can synergize with her 3 colour restriction.
") Twin Stars of Purgatory, Belial – B
Twin Stars of Purgatory, Belial – B

Pros |
Cons |
|
|
GH Belial’s Base form has little applications as their new Chibi form is much stronger.
") Twin Stars of Purgatory, Belial (chibi) (New)
Twin Stars of Purgatory, Belial (chibi) (New)

Pros |
Cons |
|
|
Chibi Belial is a significant upgrade to his Base form as their personal damage is significantly higher due to the inclusion of two 7 Combos ![]() to bring their total personal damage up to 30.375x.
to bring their total personal damage up to 30.375x.
This is an impressive personal damage multiplier but is marred by their low base ATK and lack of other utility. This lower ATK will place constraints on how well they can be used along with the fact that many mono Fire teams match blobs of orbs which prevents a 4-match from occurring.
 God of Commerce, Mercury – B

Pros |
Cons |
|
|
Mercury remains one of the best Dragon Killing solutions due to her 2 Killers ![]() , 2 >80%
, 2 >80% ![]() , ability to use Dragon Killer latents, and high base ATK. All of these enable her to deal a massive amount of damage to Dragon spawns with little effort and also gains access to a Physical
, ability to use Dragon Killer latents, and high base ATK. All of these enable her to deal a massive amount of damage to Dragon spawns with little effort and also gains access to a Physical ![]() or Attacker
or Attacker ![]() Killer Super Awakening.
Killer Super Awakening.
All together, Mercury will be a boon to any player who wishes to clear content as quickly as possible that is heavily populated by Dragons. Just be mindful that a modest chunk of her damage comes from being above 80% health.
") God of Commerce, Mercury (chibi) (New)
God of Commerce, Mercury (chibi) (New)

Pros |
Cons |
|
|
Chibi Mercury is another potent Killer solution against Physical and Attacker spawns but features less personal damage against either one compared to her Base form. This is attributed to the lack of >80% ![]() which constitutes 2.25x more ATK but being effective against 2 typings may be more valuable.
which constitutes 2.25x more ATK but being effective against 2 typings may be more valuable.
As such, the decision of which Mercury to pursue will come down to what other options you have available in your Monster Box.
 Iceblade Divine Beast, Shust – B

Pros |
Cons |
|
|
Shust returns to PAD with his 300x ATK Button that also reduces HP to 1 along with generating a row of Water at the bottom. This multi purpose active can be used to execute a low HP floor, set up other Buttons that wish to be low health, or make orbs to sweep a given spawn.
This is on top of their 4 Skill Boosts ![]() and modest personal damage. With that being said, this is still a relatively niche card overall and their new Pixel form may be more appealing.
and modest personal damage. With that being said, this is still a relatively niche card overall and their new Pixel form may be more appealing.
") Iceblade Divine Beast, Shust (chibi) (New)
Iceblade Divine Beast, Shust (chibi) (New)

Pros |
Cons |
|
|
Chibi Shust is a truly unique card as he offers an unprecedented 8 Water Rows ![]() and 4 Skill Boosts
and 4 Skill Boosts ![]() along with a 4 turn active skill. These Rows result in tremendous Passive Damage for the entire team and will be a massive boon to any mono Water team that wants more damage.
along with a 4 turn active skill. These Rows result in tremendous Passive Damage for the entire team and will be a massive boon to any mono Water team that wants more damage.
In fact, any Farming team could benefit from Chibi Shust as their 4 turn cooldown that makes a Row can be cycled back up with Hastes and can potentially be used multiple times in a single dungeon.
As a leader, they feature a massive ATK multiplier but is marred by needing to make 7 or more combos and having 6 connected Water orbs while only have 6 seconds of Orb Movement Time. This is a steep condition that may not be fulfillable from a given board along with Farming teams wanting to use as little brainpower as possible when solving boards.
 Goddess of Purity, Artemis – B

Pros |
Cons |
|
|
GH Artemis features 2 Devil ![]() and 2 Evolution Material
and 2 Evolution Material ![]() Killers and the ability to use either of these as Killer Latents. Furthermore, she comes with high base ATK which helps ensure she does sufficient damage to sweep those spawns.
Killers and the ability to use either of these as Killer Latents. Furthermore, she comes with high base ATK which helps ensure she does sufficient damage to sweep those spawns.
As a general statement, there are many more cards with 2 Devil Killers compared to Evolution Killers which does give Artemis a stronger niche to fulfil but at the same time, it is rare to need this Killer.
As such, you will have to decide on whether you feel you will gain more mileage out of Devil Killer latents over Evolution Material Killer latents as Artemis is a solid solution for either. With that being said, if you have access to Zeo Megazord ![]() or other Evolution Material Killer Weapons, Devil Killer Latents will give more value.
or other Evolution Material Killer Weapons, Devil Killer Latents will give more value.
On the other hand, Artemis is able to generate a row of Light orbs at the top along with a 6 turn cooldown which is short enough to potentially use twice in a dungeon you plan to excessively Farm.
") Goddess of Purity, Artemis (chibi) (New)
Goddess of Purity, Artemis (chibi) (New)

Pros |
Cons |
|
|
Chibi Artemis continues the trend of a powerful orb changer with a pleasantly low cooldown that is “handicapped” by a massive ATK Debuff for the owning card’s sub attribute. While this ATK Debuff is sizable, it is really blessing as it will overwrite any existing Debuff along with the main attribute’s damage not being impacted.
As such, players gain access to a 5 turn cooldown that generates a column of Heart and Light orbs. This can allow players to heal and deal damage at the same time or if using as a leader, form a Heart Cross.
This leader skill features a wonderfully high ATK multiplier and 75% Damage Reduction but suffers from the same issues all Heart Cross leaders face. Firstly, Chibi Artemis has no HP multiplier which means that if you fail to match a Heart Cross, you will most likely die along with being unable to stall. While the +3 combos per leader is tempting, Resolve spawns will be problematic along with Voids.
Taking this into consideration, I would stick her Artemis’s Base form as it offers a solution to Devil and Evolution Material Killing and a low cooldown Light row maker.
 Kaguya, Princess of Tsukuyomi – A

Pros |
Cons |
|
|
This is the second Tsukuyomi to be featured within the GungHo Collab and while she does feature an easy to use Leader Skill, there are countless others who can perform as a transitional leader for newer boxes.
As such, players should look at her wonderful Weapon Assist.
 Weapon Assist

Pros |
Cons |
|
|
During the previous GungHo Collab event, I gave this Weapon Assist an S rating as it was one of the best solutions for Alt. Arena 4 due to the amazingly powerful active and Full Bind Immunity.
This active skill will provide a small buff to movement time, ATK, and RCV which in turn overwrites any existing debuff of that kind. Amusingly, all three are incredibly common within Alt. Arena 4 which was the current hardest dungeon in the game.
Fast forward to today and Shura Realm is the hardest and most lucrative dungeon to play which has relatively few of these debuffs. As such, the overall value of this Weapon has gone down but if you are still playing through AA4 or the dungeons leading up to it, this Weapon will be a boon to your teams, especially when inherited on low cooldown, bind vulnerable cards such as Diaochan ![]() or Aten
or Aten ![]() .
.
5 Star base
 Helen – B

Pros |
Cons |
|
|
Helen is the first 5-star card within GungHo Collab event and her Base form is laughably lackluster. Make the Chibi form.
") Helen (chibi)
Helen (chibi)

Pros |
Cons |
|
|
Helen’s Chibi form is a significant upgrade as she is now able to provide 5 Enhanced Heart Orbs ![]() which in turn allows her to function as a Healing Solution. Furthermore, she has a useful active skill that will clear 7 turns of Bind and Awoken Binds on a wonderfully fast cooldown.
which in turn allows her to function as a Healing Solution. Furthermore, she has a useful active skill that will clear 7 turns of Bind and Awoken Binds on a wonderfully fast cooldown.
This 3 turn cooldown can be abused to carry another inherit but Helen is not without faults as she has low Weighted Stats, requires heavy investment to achieve these low 1k stats, and little awakening diversity.
As such, I feel she will may be overlooked if players have another Healing Solution available due to the investment requirement and how easily she can be powercrept.
On the other hand, she can function as an easy to use transitional leader due to the 15 seconds of orb movement time, respectable multipliers, and need to only match 3 colours to activate.
 Konohanasakuya – B

Pros |
Cons |
|
|
Make Chibi form.
") Konohanasakuya (chibi)
Konohanasakuya (chibi)

Pros |
Cons |
|
|
Chibi Konohanasakuya has the ability to function as a Machine Killing solution for mono Fire teams due to her triple 7 Combo ![]() , 2 Machine Killers
, 2 Machine Killers ![]() , and naturally high ATK. Together, these grant her 72x ATK against Machine spawns which is fantastic for Shura Realm.
, and naturally high ATK. Together, these grant her 72x ATK against Machine spawns which is fantastic for Shura Realm.
With this in mind, she can be potentially used on your Gileon ![]() teams as an alternative to Inahime
teams as an alternative to Inahime ![]() and future Pixel Napoleon
and future Pixel Napoleon ![]() . The main reason why players want to bring a Machine Killing Solution on Gileon teams is for floor 1 when Gileon and Grandis
. The main reason why players want to bring a Machine Killing Solution on Gileon teams is for floor 1 when Gileon and Grandis ![]() have not Transformed.
have not Transformed.
As such, a single sub with high personal damage against Machines will be needed. Each of these three options are viable but one thing Inahime and Napoleon have going for them is the ability to naturally spawn Fire orbs with their base skill. This means you have a certain degree of safety on floor 1 as you can always find additional Fire orbs. This can naturally be corrected by inheriting something on top of Chibi Konohanasakuya due to their 3 turn cooldown.
One noticeable drawback Konohanasakuya has is significantly lower HP and less awakening diversity as she is only about personal damage and little utility/no Resists. Of course, this can be managed and her personal damage output does surpass Inahime. With that being said, once Grandis and all the Gileons Transform, your damage needs will be taken care of.
 Tenfufa – C

Pros |
Cons |
|
|
Scroll down.
") Tenfufa (chibi)
Tenfufa (chibi)

Pros |
Cons |
|
|
Chibi Tenfufa features triple TPA ![]() and three Balance Killers
and three Balance Killers ![]() which gives her a noticeable advantage over other Balance Killing options. Sadly, her base ATK is terribly low which does lower her ability to perform well along with her having to always match a TPA to truly shine.
which gives her a noticeable advantage over other Balance Killing options. Sadly, her base ATK is terribly low which does lower her ability to perform well along with her having to always match a TPA to truly shine.
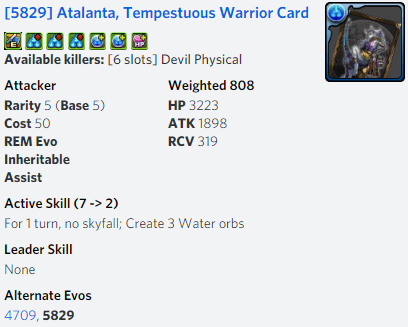
 Atalanta, Tempestuous Warrior – C

Pros |
Cons |
|
|
No value in this form.
 Weapon Assist
Pros |
Cons |
|
|
Atalanta’s Weapon Assist is able to provide a significant amount Passive Damage for mono Water teams but suffers from a low cooldown that can accidentally charge up and leave players with a lackluster effect.
This is problematic and often time, Damage Weapons are pursued after covering all Resists so I feel that this Weapon will only see sporatic use.
 Orpheus the Pining Poet – C

Pros |
Cons |
|
|
Orpheus’s Base form is able to function as a possible Button Base in multiplayer due to their 2 Coop Boost ![]() awakenings. These will inflate his stats to allow him to carry a Button active skill that scales with the card’s ATK. This in turn may allow him execute higher health spawns.
awakenings. These will inflate his stats to allow him to carry a Button active skill that scales with the card’s ATK. This in turn may allow him execute higher health spawns.
With that being said, this is a relatively niche usage and will only have merits if you play coop.
 Weapon Assist

Pros |
Cons |
|
|
Orpheus’s Weapon Assist can grant another card Coop Boost ![]() which in turn bolsters their stats when used in multiplayer. This will most likely be used for augmenting a Button card’s ATK such as Brachydios
which in turn bolsters their stats when used in multiplayer. This will most likely be used for augmenting a Button card’s ATK such as Brachydios ![]() .
.
Of course, this is a relatively niche usage and only work in coop mode.
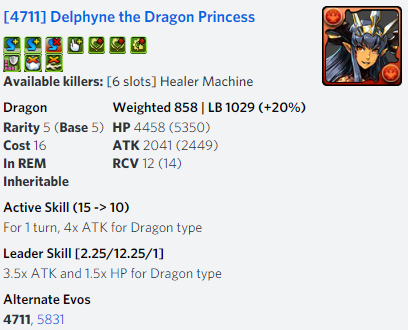
 Delphyne the Dragon Princess – C
Pros |
Cons |
|
|
Delphyne is able to function as a respectable Healer Killing solution due to her 2 Killers and ability to take Healer Killer latents. This grants her reliable damage output with no specific combo pattern. Of course, she is only useful against Healers and will most likely be a Ranking Dungeon or Farming solution.
 Weapon Assist
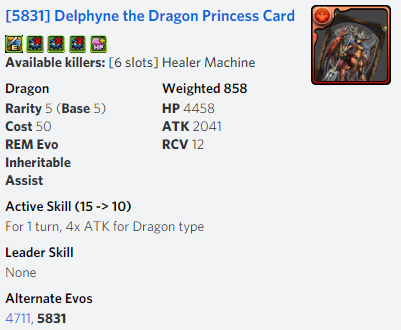
Pros |
Cons |
|
|
Delphyne’s Weapon Assist is able to provide 60% Jammer Resist ![]() which can be useful but at the same time, has less extra benefits compared to other Weapon Assists along with an active that will most likely not be helpful.
which can be useful but at the same time, has less extra benefits compared to other Weapon Assists along with an active that will most likely not be helpful.
As such, I feel that if you only have a single Delphyne, I would keep her Base form unless you have stronger Healer Killer solutions available.
Do I plan to roll? & Dream rolls
I do not plan on rolling within the GungHo Collab REM as I already the majority of bottom rarity cards along with a modest array of 6-star cards along with a few 7-stars. I say this now but there is a strong chance of peer pressure goading me into a few rolls on my ![]() Twitch Stream.
Twitch Stream.
While the rolling rates are respectable for any top rarity card, I will not gain any value from acquiring any of the 5-star cards as I either have them already or will not gain any value from them based on other cards within my Monster Box.
With that being said, it is always fun to imagine what could happen with a few magical rolls. For my dream 7-star card, I would love to have the new Minerva ![]() as she will help me develop my fledging Rainbow box while also giving me a non-7×6 leader to pair with Dyer
as she will help me develop my fledging Rainbow box while also giving me a non-7×6 leader to pair with Dyer ![]() friends.
friends.
For my dream 6-star card, the new Chibi Urd ![]() will have by far the most value for myself as her ability to function as both a lead and sub is meaningful. Kind of baffles me how she got so much more love compared to Skuld and Verdandi.
will have by far the most value for myself as her ability to function as both a lead and sub is meaningful. Kind of baffles me how she got so much more love compared to Skuld and Verdandi.
For my dream 5-star card, none of them are truly amazing but Konohanasakuya’s Chibi ![]() will be the most interesting/valuable for myself despite owning Inahime
will be the most interesting/valuable for myself despite owning Inahime ![]() . I am not sure if I would use her on my Gileon team as I do enjoy the safety net of Inahime’s base active making Fire orbs should things go badly.
. I am not sure if I would use her on my Gileon team as I do enjoy the safety net of Inahime’s base active making Fire orbs should things go badly.
My Dream Rolls |
||
7*
|
6*
|
5*
|

")
")
The above chart are the cards I would love to acquire from each rarity if I could choose one for my Mantastic account. This is my own personal opinion based on my Monster Box, goals and whether or not I have dupes.
Conclusion
The GungHo Collab REM has value across the 7 and 6-star rarities with the bottom rarity not being a complete disaster as it has been in the past.
As such, some rolls may be justifiable but at the same time, this may be a better event to just Monster Exchange as the 5-star cards will most likely not have much value for more Developed Boxes.
With that being said, it only costs 6 Magic Stones along with a 25% chance for any 7-star card is appealing.
Taking all of this into consideration, let me know what you think about the GungHo Collab Rare Egg Machine and how much you plan on rolling in the comments below.
Happy Puzzling!
If you enjoy my content, please consider turning off AdBlocker for this website. If you wish to directly support me, please click the beautiful image below.![]()


woke up this morning not seeing ur review. i thought i need to use my brain this time (if i have one) to figure out what is good. thanks for ur wirteup
LikeLike
Glad I managed to finish reasonably on time =D
LikeLike
I’m sorry but PLEASE EXPLAIN TO ME how in 30 rolls I roll only THREE 7*, all 3 of which were dupes and I only had 3 different 7* cards going into this. I’m beyond speechless and livid. 2x Luluna who is trash since green has no place in the current meta and Yomi who I guess is getting defaulted to her inherit form.
LikeLike
That is truly sad to hear =(
LikeLike
sorry I just had to vent…haven’t gotten back to Reddit yet so I wasted space in the comments to complain being pretty much non-IAP since I was a whale back in the day the REM sucked. Been following your website for over a year now and just wanted to say thank you for all your help and dedication to posts/reviews/videos. I know you don’t have friend space but would love to add you some day!
LikeLike
Hello Mantastic,
How would an ideal Urd chibi team looks like form farming?
Thx for helping me out!
LikeLike
All depends on the dungeon at hand =) But Rows will be tremendously helpful
LikeLike
While niche, I’m looking forward to making a Chibi Tenfufa for the orb time LS. For annoying dungeons like Moby or No Awakening dungeons, where move time is the primary concern, she is respectable. For fixed move time dungeons, pairing with a Yugi would be highly respectable as far as damage just from making a dark row. Not great for the newest end game content, though.
LikeLike
Yeah all the chibi 5-stars have this useful aspect where they grant a copious amount of movement time and reasonable multipliers
LikeLike
Hey mantastic,
Since GH Yomi is back in rotation, I am wondering what changes did you made for your previous GH Yomi x Norza team to tackle AA4 from your previous article few months back? Or nothing really changed? I have the same exact set up (beside the uruka equip.. I’m using reeche hat) so I’d be interested to know what how you optimize your team with the current available units. Thanks!
LikeLike
The biggest hole in my team is a lack of a Norza sub, having that would be the biggest boon
Beach Planar is a new possible card (I don’t have) that would be another good fit
But for my own box, I don’t think I have received anything new outside maybe Allatu as she can work as a 7SB solution
LikeLike
Tsukuyomi, Raphael and Reeche are the only three monsters that I’ve have so far. I’ll turn Reeche and Raphael into Weapon Assist because I’ve already have 2 NY Reeche already and I don’t really need Raphael for anything else. As for Tsukuyomi, I’ll keep her in my Light/Dark Team until a better Light or Dark Monster comes along since I had to give up Halloween Cotton for Halloween Suou through trading.
LikeLike
I am still amazed by how much stronger NY Reeche is compared to any other Reeche and makes me wish I had one myself
LikeLike
You don’t have NY Reeche? That’s ashamed I thought you might have at least 1 or 2 like me. But anyway what can I do with Raphael because I’m thinking of making his as an assist monster since I’ve already made a Wood/Dark Team and I’ve don’t have a place to put him in or any other team as of now.
LikeLike
Thanks to the god fest free pulls plus the three other GungHo Monster that I had, I’ve traded them to get Minerva. Now I won’t have to spend Magic Stones for this collab anymore. But I am sad that they didn’t bring back the older cards but oh well at least I’ve gotten Minerva and Karin. Which is fine by me.
LikeLike
The older cards will return and how has Minerva been treating you?
LikeLike
She’s doing good but it’s hard to choose between Gintama base form and her on my Rainbow Team.
LikeLike
I didn’t realize it before but it’s pretty crazy that Chibi Skuld can have 5 SB with only 3 CD.
LikeLike
it does enable her to function as a wonderful inheritance base =)
LikeLike