Puzzle and Dragons is a tremendously deep game that has years worth of content waiting for players. Sadly, there is essentially no in-game information as to what mechanics, spawns, or what can actually happen in a dungeon which in turn creates a terrible guessing game.
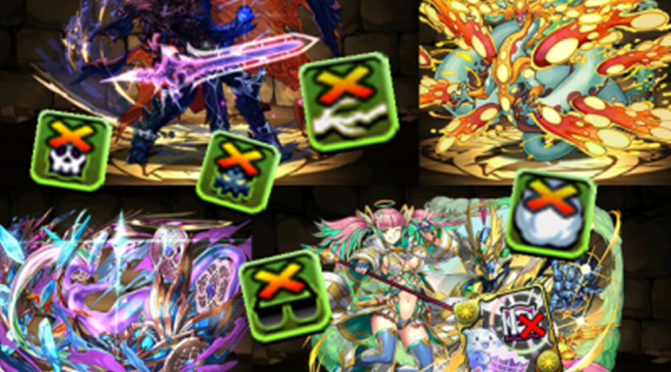
Thankfully, we are eventually able to “solve” any dungeon with enough trial and error and for myself, what I find most helpful when trying to tackle a new dungeon is a Checklist of notable mechanics. From this Checklist, I will try my best to address all of the dangerous mechanics while prioritizing unavoidable abilities.
With this in mind, I would like to create a master Checklist for all of the Arena, Colosseum, and World of Carnage dungeons to help players better prepare themselves as knowing what can possibly happen is a huge asset in PAD.
Video commentary
—
How to use my checklists
With any dungeon, there are avoidable and unavoidable mechanics and it is important to address the unavoidable mechanics first. As such, there will be a priority-like system when looking at dungeon mechanics and you may have to forgo certain solutions depending on the depth of your Monster Box. Furthermore, certain teams/leaders may naturally counter specific mechanics. Continue reading Arenas, Colosseum, WoC/Shura, & MD1 Mechanics Checklist→
Puzzle and Dragons is a challenging game as it combines numerous different elements but the orb solving/puzzling aspect is one of the most endearing aspects. Despite playing for over 2,000 days, I still have lots to learn about optimally solving various boards want to dedicate a post to better solving these.
For the most part, utilizing a bicolour board is the best way to optimize your potential as it usually yields the highest number of combos along with the most concentrated damage. With that being said, there are more optimal ways for solving these for both vanilla combos and for specific awakenings. Continue reading Optimal Boards Compilation→
With the announcement of free 390,000 Monster Points being given out to all players over the course of March along with the highly anticipated evolutions for the original 5 MP Dragons, many players are excited to take the next step in their Puzzling adventure. However, these evolutions are challenging to perform and very few players are actually able to clear Arena 3 and acquire the Radar Dragon they need. Thankfully, we will now gain the ability to “easily” acquire any Radar Dragon of our choosing through a special hourly dungeon.
While this is great for the most part, these dungeons are actually very challenging and feature their respective Radar Dragon in a buffed form compared to their Arena 3 counterpart. However, the dungeon is quite short in nature and there are many different strategies for efficiently dealing with each encounter along with the option to simply stone to continue if you badly need the drop.
I plan to clear and record all of the dungeons and will upload the team/video to this post as they are released.
If you want to read more about which MP card to purchase, please refer to my guide HERE.
Player 2: 1 combo
Player 1: PASS Player 2: Raphael swipe Player 1: 1 combo Player 2: Sun Quan , Hermes or Blue Sonia Player 1: 0 combo, do not kill Player 2: Kill via ping as Apollo is at 1 HP
Floor 3
Player 1: Mori , Sarasvati & try to push below 50% Player 2: Push below 50% if triggered resolve. Use any actives Player 1: Blue Sonia , Sarasvati Kill
Karin has God and Dragon Killer which enables her to deal incredible burst damage against all 3 floors and 9x to Heph.
You should plan out who will be receiving the 15 turn skill delay and try your best to use actives from that side wherever possible. In my case, Player 2 is delayed.
On the final floor, you can trigger the resolve as it will heal him to 50% HP and 1 health. You simply need to ping with any source of damage to remove the resolve.
Sarasvati could easily be replaced by any high damage glass cannon leader. You should prioritize heavy orb changers as it is simply a burst and kill scenario.
If unable to inherit Raphael , can simply use him as a sub or use a large shielding sub to survive. Do your best to return to full health every turn.
Killer awakenings are very powerful here as there is no absorption mechanic and the resolves are not too hazardous. You can hit Heph into resolve and then have him resurrect without taking any damage.
Noah Dragon
NOAH DRAGON HAS 52 MILLION AND PADX HAD IT DISPLAYING A VERY INCORRECT AMOUNT. SHOULD BE FIXED SOON
Do not bring a dark team. Also, find a team that has very high damage output. Pretty much the only hard requirements. You can simply stall the 99 turns, but that is quite a grueling experience and if you want to kill faster, you need to have appropriate damage control. Do not use Killer awakenings.
Noah Dragon VOIDS all damage above 5 million. Void means it will deal 0 damage when dealing more than 5 million damage and means cards like Fujin have no effect.
Player 1: 1 combo Player 2: Raphael -> Dios Swipe Player 1: PASS Player 2: Ping for 1 damage
Floor 2
Player 1: Green Odin -> Dios Swipe
Floor 3
Player 2: Famiel -> Sakuya -> Hades -> PASS Player 1: Sakuya -> Yomi -> Dios Swipe
Assuming the team is at least +99 attack, you will always kill Zeus Dragon even with 1 combo:
This comes out to around 50-51 million damage and you only need 48 million to kill Zeus after the Gravities. Tengu will have a tiny bit more attack when I inherit Green Odin.
I had to make an adjustment to my team as people have pointed out that 20 million damage from the Sakuya Gravity would be voided (I thought 20 million was safe) so I am using Famiel to tickle for 100,000 damage then proceeding as normal. You must use Gravities in the order that is listed.
For some reason my Hera-Beorc is missing from my box so I am doing this strategy instead of using her 10% gravity.
Player 2: Hera-Is , Zeus/Hera , Hades , Meri 7 combo, kill
Floor 3
Player 1: Indra when going to be hit. Genie after
Make a row + 2-5 combos based on your own damage output
Player 2 can have dark cards as the binds only hit the Player 1. I have 3 SDR on most of my Player 1 cards and the 2 turn haste from Mori help brings those cards back up.
You cannot use a 50% damage reduction shield as this Hera Dragon hits significantly harder than the Arena 3 version. On Hera Dragon, you must never match more than 6 connected water orbs in a row formation. You can go for 7+, but it has to be in a blob. The amount of combos you make is dependent on the number of your Orb Enhances and Row awakenings your team has.
The three Gravities push Ceres below her 30% resolve right away and any combination you can configure that achieves the same result is fine.
A very popular strategy is to use Reincarnated Hades and his massive dark damage reduction to cheese your way through. Just make sure you bring a 10 turn bind clear for the first floor.
Conclusion
I will continue to update and populate the team rosters as I do more research and actually play the dungeons along with uploading the videos right away.