Category Archives: Challenge Dungeons

One-Shot Challenge Clear Videos

Introduction

Against my own better judgement, I used a single stone to refresh my stamina to complete all the One-Shot Challenges as I had used most of my stamina to play Arena 3 on my Twitch Stream (where I had two heroic clears!). However, it may work in favour for my readers as you now get to see my clears a bit faster than natural stamina would have allowed.

I tried to use less popular leaders or leaders I seldom play to both increase the excitement as well as to give variety to players and hopefully provide some inspiration on how to overcome these challenges.

One interesting aspect of these challenges is that they disappear after completion so it is challenging to refine a perfect strategy and I am a little more excited if my plan works out.

Level 10 vs Awoken Lucifer

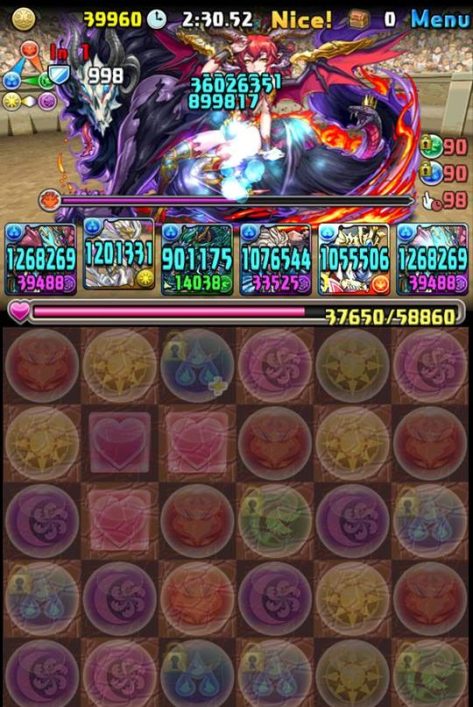
The key to success was to avoid a light skyfall on the Shieldras along with praying for sufficient heart orbs to drop down. The recovery badge was vital to my success as it allowed me to heal enough each turn to tank each subsequent hit.

Awoken Archdemon Lucifer Eschamali Yomi Dragon Awoken Pandora Dark Valk Awoken Archdemon Lucifer

Overall a relatively smooth run, just have to be able to heal back to full health to tank Myr’s various attacks.


Level 9 vs Cameo (yes, the Gemstone Princess)

I had a little too much fun abusing the 3x to all stats for 6-star cards and decided to take my excitement further by using the simply unheard of Cameo as a leader to form a 28x ATK team.

Cameo Ult Zeus Dios 3074 Australis Balboa A Liu Bei

If there is one video you watch today it should be this one.


Level 8 vs Awoken DQXQ

Relatively straightforward and abusing the ample Dragon typing for free damage and stats.

Awoken DQXQ W Iza Awoken Apollo Yomi Dragon DQXQ LL Awoken DQXQ

Yomi Dragon is used for the Dragon typing, dark coverage, and ability to hasten up my team if Thor is unfriendly with his skill delay attack.

Conclusion

I thouroughly enjoyed playing through this series of challenges as it gave a nice break from coop and gave me the opportunity to test my puzzling skills in new content. Hopefully you enjoyed these videos as I tried to utilize a variety of leaders to showcase different playstyles.

Let me know what you used to clear these challenges.

Happy Puzzling!

PAD X, Ana Descended Snowglobe Challenge with Awoken Sakuya and Super Gravities

Introduction

The Light Snowglobe that mysteriously appeared in your mailbox is meant to be used on your team for a solo clear of Ana Descended over the course of the weekend. There are many different ways to approach this challenge and thankfully, it was significantly eaiser than Liberty Geist so newer players should have more wiggle room for error. Just note you must complete the dungeon with a Blanc Snowglobe on your team before Sunday on any difficulty in solo mode.

Video clear

Strategy used

Ana Descended is a relatively easy dungeon and has many different avenues for a successful completion. I could have easily used a tank or heart cross leader (which I did on Fantastic), but instead, I decided to use a more old-school strategy that focused on using gravities to bypass the 50% resolve.

Outside of the 50% resolve, Ana Descended has no dangerous mechanics and offers numerous floors for stalling. This meant my Awoken Sakuya team could easily stall for actives with the recovery badge in order to have everything ready in time for the final boss.

Heart cross/tank teams may feel more safe due to the inherit durability, but it can be cumbersome to deal with the resolve and I actually took less time with my gravity team.

14800703_10153969640720814_634842863_n

Conclusion

Do not fuse away your Light Snowglobe as you may lose out on your chance to earn an additional 3 if you are able to successfully clear Ana Descended with one on your team.

I used both the heart-cross and gravity team and  were equally effective. What did you use to overcome this challenge?

Happy Puzzling!

Solo Challenge 10 with Sarasvati (7×6 Board)

Introduction

Challenge Dungeons 29 is another opportunity for players to test their puzzling skills along with creativity to overcome a new set of obstacles for valuable rewards. For this Challenge 10, I decided to clear it solo to showcase how a glass-cannon leader with the proper planning and skyfall luck can succeed.

Video clear

Dungeon commentary

I do not have a fully skilled up Amon Amon and was part of the reason I entered Coop as it would allow me to have sufficient skill boosts along with saving 50 stamina. If he had been skilled up, there would have been no need to enter via coop. If you disconnect from multiplayer, you do not receive the Quest Badge bonus (which is somewhat irrelevant as you would be choosing the +5% attack).

The reason I bring Amon is to utilize his counterattack mechanic to bypass Zeus/Hera’s resolve ability as they will strike you with a 90% health cut which is immediately counterattacked to kill them. This produces a safer run as you no longer have to worry about that floor.

Aside from the counterattack ability, my subs were mostly chosen for their orb changing capabilities to ensure I have enough Water-power (not firepower) to drown each floor. It is also beneficial to use a water team as the Blue Puppeteer will produce water orbs for free.

Finally, I used Andromeda to ensure my sub attributes do not heal the various encounters due to their colour absorptions.

Conclusion

This Challenge 10 is easily manageable with a non-light or dark glass cannon team as all the floors have high health values along with low mechanics.

What did you use to clear Challenge 10?

Happy Puzzling!

[Video] +297 Hera Dungeon Strategies and Guide

Introduction

To mark the celebration of the third year anniversary, GungHo will be granting players the opportunity to play the +297 Hera “Gift” Dungeon. The word Gift is misleading as it is a challenging dungeon to clear and Gift is only used to indicate that it is a one-time clear and has to be done in solo mode.

Mantastic & Fantastic’s video clears

Mantastic’s Sarasvati 3069

A much riskier team due to the orb hungry nature of Sarasvati. There is a certian amount of praying required to either skyfall a water combo or have enough present to conserve actives. However, it was a pleasure to play with and the damage on Minerva was Nuts Nut 😉


Fantastic’s Awoken DQXQ Awoken DQXQ

DQXQ was a lot safer by comparison due to the less orb hungry nature of her leader skill. I could use the 16x ATK and TPA down the easy floors and only had to form rows starting at floor 5. It also helps that both leaders have a more impactful active skill.

Team used

Will update when I play this dungeon. Myr Miru is the default/easy choice but may try and use a different leader to showcase a more novel strategy.

JP clears

As this is a one-time clear dungeon, I decided to showcase various JP clears with leaders I do not own to provide another layer of inspiration for theory crafting viable teams. You can use the search term as well:  神王妃 絶地獄級

Light Myr Miru

Reco’s clear using Myr. I also speculate she will be the easiest to use for this dungeon.


Ace Best Cat Cross Bastet

Continue reading [Video] +297 Hera Dungeon Strategies and Guide

[Video] Liberty Geist Snow Globe Challenge featuring Sarasvati

Introduction

GungHo has been spoiling us with unique challenges these past few days with the currently active +297 Zeus Dungeon (my strategy and post can be found HERE) and now the Liberty Geist Snowglobe Challenge. In order to complete this challenge, you must use the Snowglobe Rouge you received in the mail (do not fuse away) and have him be a sub on your team (cannot be leader). Full rules are stated below:

Liberty quest

TLDR: Do not fuse that Snow Globe, use him on your team as a sub, complete in solo mode with no continues on either difficulty.

Video clear


My team looks very unusual, but at least showcases ways to overcome the various mechanics. Outside of a flubbed combo on the boss, the run went relatively well.

Team roster

I used the exact same team for both Mantastic and Fantastic and only forgot to inherit an active onto Fantastic’s Snow Globe.

3069 Blue Sonia BL Hermes Hera-Is 520 3069

Continue reading [Video] Liberty Geist Snow Globe Challenge featuring Sarasvati

[Videos] Challenge 10 & 9: A Mantastic & Fantastic Coop Spectacular

Introduction

This round of Challenge Dungeons came with a wide array of challenging spawns along with problematic mechanics that require careful planning to overcome. All the videos were lifted from my Twitch stream (which you can catch every Monday and Thursday at https://www.twitch.tv/mantasticpad) so excuse the lack of editing. Blue Sonia Blue Sonia is an Fantastic leader due to her high burst potential, wonderful damage control, and insane recovery. Due to the music being played on stream, some countries may not be able to view them on YouTube; however, you can simply re-watch the past broadcast on Twitch =)

Challenge 10

Challenge 10 had a wide array of troublesome spawns that required you to have damage control, bind clearing, and high burst damage to succeed. I made a nearly lethal error on the second floor as I misread that he will bind all monsters for 4 turns on his first attack. Lesson learned: carefully read all the dungeon mechanics!

Blue Sonia BL Hermes Bankai Andro Ryune I&I Blue Sonia
Blue Sonia BL Hermes Awoken Oorochi Blodin BL Hermes Blue Sonia

I used B/L Hermes BL Hermes as a base for inheriting Awoken Sakuya Sakuya to remove the preemptive dark binds from Nordis. Normally having a card that is not bind immune inherit a bind clear is risky; however, Nordis will only bind dark monsters so I was safe.

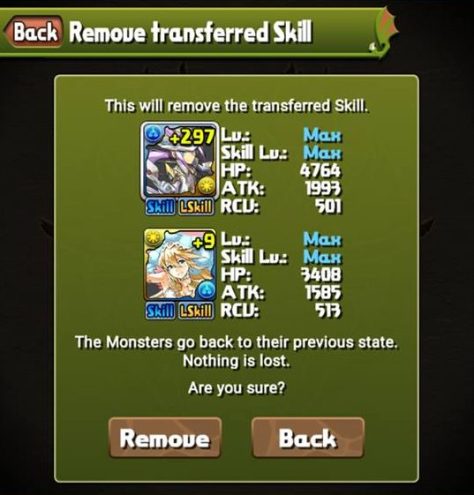
Hermes Inherit
I eventually broke the transfer

Aside from the miscalculation on the second floor, everything went according to plan and just goes to show the power of Blue Sonia when it comes to stalling.

CH10 kill shot
Nordis got wet

Challenge 9

Challenge 9 should have been renamed “How to Kill Ilsix” as the other floors were relatively straight forward by comparison. I chose to use Blue Sonia due to her amazing recovery and her ability to easily handle Ilsix at the end. Continue reading [Videos] Challenge 10 & 9: A Mantastic & Fantastic Coop Spectacular

[Video] Challenge 10 “Solo” Blonia Clear

Question of the day: Does it count as a solo clear if you are the only person playing? Even if it is your two accounts? Regardless, here is another video of me playing with myself in this Challenge 10 series:

Everyone is +297 and max skilled. One rainbow resist per team.Blue Sonia Bankai Andro Ryune BL Hermes I&I Blue Sonia
BL Hermes Awoken Oorochi Blodin Mori Motanari

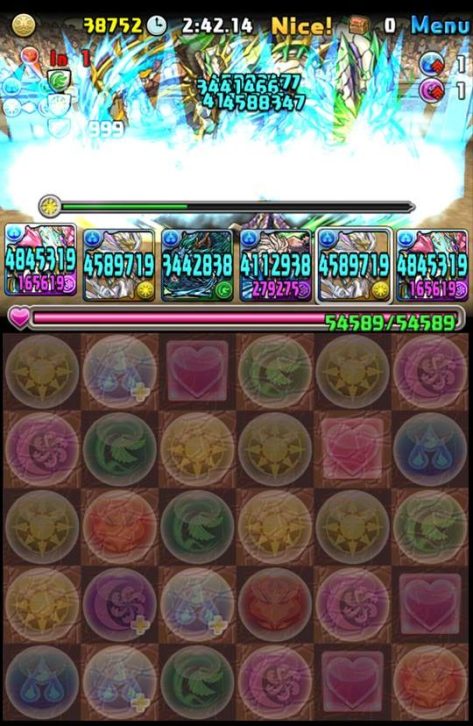
This dungeon was almost made for Blue Sonia as her entire team consists of Dragon / Physical monsters and made it a lot easier to clear as my entire team was benefiting from a 50% increase to all stats. One of the most important aspects of Blue Sonia teams is the ability to heal large amounts of health due to a 6.25x RCV multiplier. This allows for easy stalling and was vital for my strategy as I needed to recharge Orochi for the final boss. Even though my matching wasn’t flawless, I was still able to scrape out a victory and only had to do one attempt.

I find that it is best to wait out the awakening bind on Linthia before using your delay as you can then have an uninterrupted 5 turns to kill her without having to deal with any execution mechanics. In addition, you should try to keep your heart orbs away from the outside columns as she has a high chance to remove them.

I also cleared challenge 9 with the same team, but sadly forgot to record.

Ch9 clear

What did you use to clear this series of challenge dungeons?

Happy Puzzling!

[Video] Blue Sonia VS Challenge level 9 with Ilsix and 30% Resolve

Challenge 9 felt more challenging than level 10 due to Ilsix Ilsix and his 30% resolve. This is one of the most difficult mechanics to deal with and the problem is further complicated by his high damage and random spawn of jammer, water, and heart orbs if you do manage to get him into the 30% “safe” zone.

One of the most important aspects of Blue Sonia Blue Sonia is her naturally high base HP and incredible 6.25x RCV for dragon and physical type monsters. This allows her to be extremely durable in coop play where your HP pool is augmented and you are able to essentially use actives in quick succession in short floor dungeons. My dual colour row-cascade matching comes from a lot of practice in endless corridors and is an amazing way to improve your damage output and combo potential.

c9 blonia
Blue Sonia
 BL Hermes Blodin Awoken Oorochi Mori Motanari Blue Sonia
Bankai Andro Ryune BL Hermes I&I

I also cleared Challenge 10 with Blue Sonia, but was unable to record and the two screenshots should provide some inspiration. I used my burst damage prior to Vishnu and was a matter of chipping him down without surpassing 2 million damage as he already halves water damage.

ch10 clear

ch10 team

Best of luck in your coop challenge endeavours.

Happy Puzzling!

[Video] Challenge Dungeons 23, Level 10 Zero Stone and Commentary

Challenge Dungeons 23 features 7×6 boards and was one of the easier challenges to date. We now have access to amazingly powerful monsters, an unlimited stalling potential second floor (through Parvati), and a delay-able final boss for Challenge 10.

I cleared Ch10 with both my accounts and was able to record a Fantastic clear with truly exciting gameplay….because I omitted the 99 turns I waited out on the second floor. Both accounts used all their actives to burst the first floor as you can endlessly stall on the second floor.

 Fantastic’s team:
Yomi Dragon Haku Pandora Diza Oku Yomi Dragon
Continue reading [Video] Challenge Dungeons 23, Level 10 Zero Stone and Commentary

How to kill Sopdet and her 200k Absorb

I probably speak for everyone in saying that Awoken Spodet Sopdet and her 200k absorb shield is one of the deadliest encounters in Puzzle and Dragons. Sopdet is a dangerous encounter that can be found in many challenge dungeons, Arena, or Sphinx Descended. She is the cause of many heart breaks and I wanted to share some strategies I use to mitigate the risk.

Sopdet death
The pain is real

There will always be an element of luck involved when playing PAD, but it becomes even more apparent when unwanted skyfalls heal Sopdet instead of killing her. Generally speaking, Sopdet has

  • ~1.5 million health
  • Light element to start and switches to dark when under 50%.
  • Absorbs all damage dealt above 200k
  • Kills you after 4 turns

Continue reading How to kill Sopdet and her 200k Absorb